
All the emoji for the images in this post come from the gemoji project on github.

So after seeing some emoji art pop up on my timeline, I decided to dig out some old code I wrote to generate images using other images as the pixels in C#. I’d previously only done this with photos, and while the results were OK, the images were huge and Facebook would overly compress them so you couldn’t see the images making up the pixels. And as soon as you try to share anything with family outside of Facebook you’re basically condemned to intermittent family tech support for the next 27 years and, no offense guys, but fuck that.
So emoji are pretty good for this because they’re small, and you can produce pretty good ~4MP images of them which Facebook won’t compress too heavily. They also won’t reveal anything personal, especially those photos from on holiday which one may have forgotten to delete. So I made some images and uploaded them to Facebook. For attention. Attention in the form of likes and comments.
It worked, and shortly after it was suggested I put it on the proper non-Facebook version of the internet with some code. That’s basically the highest praise attainable for a programmer on Facebook, so I thought I better do it.

So here we are. Now, I mentioned the old code (2011) was in C#. It also spanned multiple files and was clearly overly-engineered for a simple blog post. So I took the opportunity to rewrite it in F# and simplify it a little so that it wouldn’t require so much explaining, or asking for forgiveness. Anyway, how do we go about doing this?

When displayed on your screen, an image is basically a 2D area of pixels, each of which is lit with a particular color. What we’re going to do is go through all the pixels in an image, and for each pixel, choose an emoji to replace it.
How do we choose which emoji to use? Well, we need to choose one which ‘looks like’ the pixel it replaces. To do this, we can choose what color an emoji is overall. This is the color it will look like when viewed from a distance. For example, an emoji which has half its pixels blue and half its pixels red will appear purple overall. That’s fine in theory, but how do we actually work that out without manually looking at every emoji?
Each color is made up of different amounts of three primary colors: red, green, and blue. Computers typically use values of 0-255 for these amounts. So, red would have 255 red, 0 green, and 0 blue. Blue would have 0 red, 0 green, and 255 blue. We can work out the mean of red and blue simply by taking the mean of the three values. So the mean of red and blue is 127.5 red, 0 green, and 127.5 blue. Now I expect this algorithm is far from perfect. Most images will tend to average towards gray. However, we can use it as a starting point and see where it gets us. That’s what learning and modern programming are all about. You fake it until you make it, and then hope your entire world does not slowly crumble from around you when you’re required to actually do some real work.

The next problem we have is what to do when we have a pixel whose color doesn’t match exactly the average color of an emoji. What we want is the closest match. So how do we find the color which is closest to another color? Well we have values for the amount of red, green, and blue of each color. What if we used those values as co-ordinates? We could use Pythagoras to find the straight-line distance between any two colors. The smallest distance would be the closest match.
This is good in theory. However, the RGB color space apparently isn’t the greatest for doing this kind of thing – colors which are similar to the human eye can actually end up quite far apart in this space. Luckily, RGB isn’t the only way to arrange colors. HSL (hue, saturation, lightness) provides a similar space which is supposedly better at keeping colors which seem similar to the human eye close together.
Computing color differences in HSL is harder than in RGB. This is because the HSL space is cylindrical, and hue is actually an angle. To translate HSL to a 3D co-ordinate we have to do some trig. But that’s not impossible. We’ll just recall all that maths stuff from high school we said there was no point in learning because we’d never need it for anything.

At this point, we basically know what we need to do:
- We have a bunch of emoji. We can work out the average color for each of them.
- We have a target image we want to generate (we’ll just use an emoji for this).
- We can examine each pixel in the target image and choose an emoji for it based on the closest matching color.
So on to teh codez. Please don’t be frightened. I will go through each bit of it in a moment.
open System
open System.Drawing
open System.IO

let loadAndScale size file =
    use bmp = Bitmap.FromFile(file) :?> Bitmap
    bmp.GetThumbnailImage(size, size, (fun () -> true), IntPtr.Zero) :?> Bitmap

let getPixels (bmp:Bitmap) =
    seq { for x = 0 to bmp.Width - 1 do for y = 0 to bmp.Height - 1 do yield x, y, bmp.GetPixel(x, y) }

let getAverageColor (bmp:Bitmap) =
    let toRgb (c:Color) = c.R |> int, c.G |> int, c.B |> int
    let r,g,b,n = getPixels bmp
                  |> Seq.map (fun (_, _, c) -> toRgb c)
                  |> Seq.fold (fun (r, g, b, n) (r', g', b') -> r + r', g + g', b + b', n + 1) (0,0,0,0)
    Color.FromArgb(r / n, g / n, b / n)

let getDifferenceHsb (c:Color) (c':Color) =
    let toCoord (c:Color) =
        let degToRad deg = deg / 180.0 * Math.PI
        let h = c.GetHue() |> float |> degToRad
        let s = c.GetSaturation() |> float
        let x = Math.Sin(h) * s
        let y = Math.Cos(h) * s
        let b = c.GetBrightness() |> float
        x, y, b
    let (x, y, z), (x', y', z') = toCoord c, toCoord c'
    let dx, dy, dz = x' - x, y' - y, z' - z
    dx * dx + dy * dy + dz * dz

let getImageWithColor (c:Color) (images:(Bitmap * Color) array) =
    images |> Seq.sortBy (snd >> getDifferenceHsb c) |> Seq.head |> fst

let run dir fileType pixelSize targetImagePath targetImageSize (resultPath:string) =
    let images = Directory.GetFiles(dir, fileType, SearchOption.AllDirectories)
                 |> Array.map (fun f -> let bmp = loadAndScale pixelSize f
                                        bmp, getAverageColor bmp)
    let targetImage = loadAndScale targetImageSize targetImagePath
    let resultSize = pixelSize * targetImageSize
    use result = new Bitmap(resultSize, resultSize)
    use gr = Graphics.FromImage(result)
    gr.Clear(Color.Black)
    getPixels targetImage
    |> Seq.filter (fun (_, _, c) -> c.A >= 160uy)
    |> Seq.iter (fun (x, y, c) -> let targetx, targety = x * pixelSize, y * pixelSize
                                  let pixel = getImageWithColor c images
                                  gr.DrawImageUnscaled(pixel, targetx, targety))
    result.Save(resultPath, Imaging.ImageFormat.Png)
Let’s break it up and look at each part.
We start by importing some code helpfully written for us by Microsoft people. The bits of code we’ll use involve math stuff (built in trig functions), media operations (drawing to an image), and file system operations (loading files and images).
open System
open System.Drawing
open System.IO

Next we declare a function which can load an image into memory (a Bitmap object) and scale it down. When loading an emoji, we scale it down in size to keep the overall image size down. This works by basically asking the code we imported from System.Drawing to do all the work for us.
let loadAndScale size file =
    use bmp = Bitmap.FromFile(file) :?> Bitmap
    bmp.GetThumbnailImage(size, size, (fun () -> true), IntPtr.Zero) :?> Bitmap

Next up are two functions. getPixels takes a Bitmap object and gives us back all its pixels – their location and their color. The next, getAverageColor, uses the getPixels function to calculate the mean color of a Bitmap.
let getPixels (bmp:Bitmap) =
    seq { for x = 0 to bmp.Width - 1 do for y = 0 to bmp.Height - 1 do yield x, y, bmp.GetPixel(x, y) }

let getAverageColor (bmp:Bitmap) =
    let toRgb (c:Color) = c.R |> int, c.G |> int, c.B |> int
    let r,g,b,n = getPixels bmp
                  |> Seq.map (fun (_, _, c) -> toRgb c)
                  |> Seq.fold (fun (r, g, b, n) (r', g', b') -> r + r', g + g', b + b', n + 1) (0,0,0,0)
    Color.FromArgb(r / n, g / n, b / n)
So getPixels basically says, for each co-ordinate x in the image, and for each co-ordinate y in the image, get me the color at (x, y).
getAverageColor basically gets all the pixels and goes through them calculating the total amount of red, green, and blue in the image. It then divides all the totals by the number of pixels to give an average.

Now on to quantifying the difference between two colors.
let getDifferenceHsb (c:Color) (c':Color) =
    let toCoord (c:Color) =
        let degToRad deg = deg / 180.0 * Math.PI
        let h = c.GetHue() |> float |> degToRad
        let s = c.GetSaturation() |> float
        let x = Math.Sin(h) * s
        let y = Math.Cos(h) * s
        let b = c.GetBrightness() |> float
        x, y, b
    let (x, y, z), (x', y', z') = toCoord c, toCoord c'
    let dx, dy, dz = x' - x, y' - y, z' - z
    dx * dx + dy * dy + dz * dz

let getImageWithColor (c:Color) (images:(Bitmap * Color) array) =
    images |> Seq.sortBy (snd >> getDifferenceHsb c) |> Seq.head |> fst
getDifferenceHsb takes two colors. It converts each one into a 3D co-ordinate from its HSL values using some basic trig (in the function L is actually B for brightness – I wrote the code before referencing the HSL Wikipedia article and, like a professional, couldn’t be bothered updating the code for consistency). We then do some Pythagoras with the 3D co-ordinates to work out how far apart they are in the HSL color space.
getImageWithColor takes a color and a list of images with their average color. It basically finds the image with the closest matching color by using the function getDifferenceHsb.

Now finally, the bit that brings it all together.
let run dir fileType pixelSize targetImagePath targetImageSize (resultPath:string) =
    let images = Directory.GetFiles(dir, fileType, SearchOption.AllDirectories)
                 |> Array.map (fun f -> let bmp = loadAndScale pixelSize f
                                        bmp, getAverageColor bmp)
    let targetImage = loadAndScale targetImageSize targetImagePath
    let resultSize = pixelSize * targetImageSize
    use result = new Bitmap(resultSize, resultSize)
    use gr = Graphics.FromImage(result)
    gr.Clear(Color.Black)
    getPixels targetImage
    |> Seq.filter (fun (_, _, c) -> c.A >= 160uy)
    |> Seq.iter (fun (x, y, c) -> let targetx, targety = x * pixelSize, y * pixelSize
                                  let pixel = getImageWithColor c images
                                  gr.DrawImageUnscaled(pixel, targetx, targety))
    result.Save(resultPath, Imaging.ImageFormat.Png)
This function named ‘run’ takes 6 parameters.
- dir is the directory containing the emoji files.
- fileType is the type of the emoji files.
- pixelSize is what we will resize the emoji to – the one’s were going to use to replace the pixels in the target image.
- targetImagePath is the image file we want to emoji-fy.
- targetImageSize is what we’ll resize the target image to, in case it’s too big.
- resultPath tells us where to save the produced emoji art.
We start by loading all the image files in dir. We load the images using the loadAndScale function, and get the average color for each emoji.
We load the target image using the loadAndScale function. We then compute how big the emoji art file will need to be. This is the size of the pixels multiplied by the size of the target image. Note that we treat everything as having the same width and height – emoji are typically square. We then create a couple of objects so that we can draw the emoji art – a Bitmap object named ‘result’ and a Graphics object which I’ve helpfully named ‘gr’. gr will allow us to draw emoji to the result bitmap.
After making the result bitmap all black, we get all the pixels in the target image. The line…
|> Seq.filter (fun (_, _, c) -> c.A >= 160uy)
…I will explain in a second. It basically makes the images look better. Anyway, for each pixel we work out where to draw the emoji in the result bitmap, find the correct emoji to draw using the getImageWithColor function, and draw it at that location. Finally, we save the result bitmap to the specified resultPath. Done!

We can use the code as follows:
run @"d:\home\git\gemoji\images\emoji\unicode" "*.png" 24 @"d:\home\git\emoji\images\emoji\unicode\1f352.png" 64 @"d:\cherries.png"

Now, there are a few bits and pieces which need clearing up. First, the following line.
|> Seq.filter (fun (_, _, c) -> c.A >= 160uy)
I avoided talking about transparency up to this point. As well as having an amount of red, green, and blue, pixels can also have transparency (known as ‘alpha’). This basically states how opaque a color should be. 0 alpha means a completely transparent colour (its red, green, and blue values won’t mean anything). 255 alpha means it’s completely opaque. The line above states that if a pixel has an alpha of less than 160, we just won’t bother drawing any emoji for it. This is very useful. A lot of emoji in the gemoji project have transparent features such as shadows. These features tend not to look too good. This gives us a pretty good result for most emoji.

Other things we could improve:
- The function to work out the mean color of an emoji could be changed. At first thought we could use the HSL color space, but that seems like a lot of work and the current one seems to work OK.
- When working out the mean color of an emoji, we ignore how transparent the pixels are. I suspect they just end up having 0’d red, green, and blue values and get treated as black (which is exactly what they’ll be with the black background I used). However, I didn’t investigate further, and as above, what I got out was good enough.
- The resulting images look a little dark because of the black background. I could do stuff like use the average color of each emoji as its background, but then you’re basically drawing emoji on top of a much larger emoji, and it felt a bit pointless.
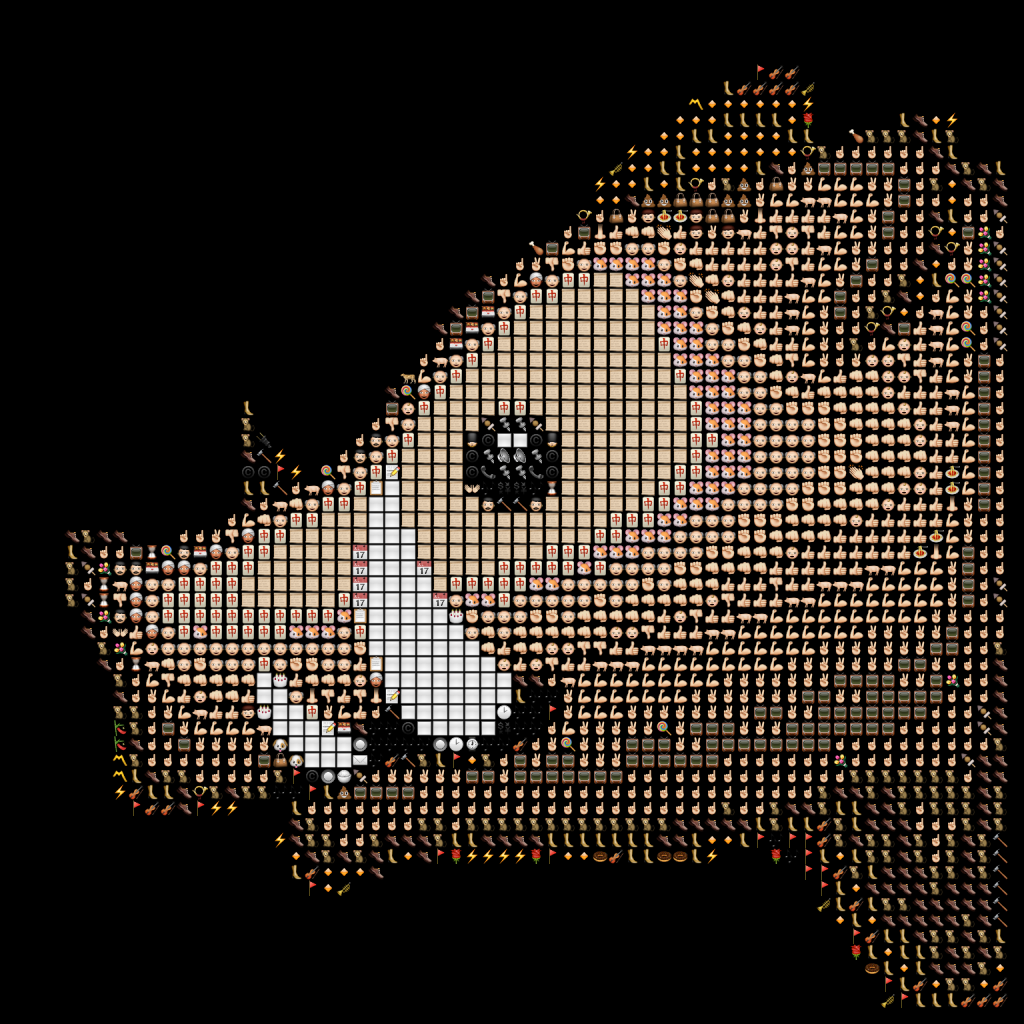
Hopefully you realize this code was a little half-assed, but whatever. It was fun and it does what I wanted it to, and it’s not like I have real people relying on it for safety like in the real world. Anyway, let’s finish with more emoji art.


Leave a Reply